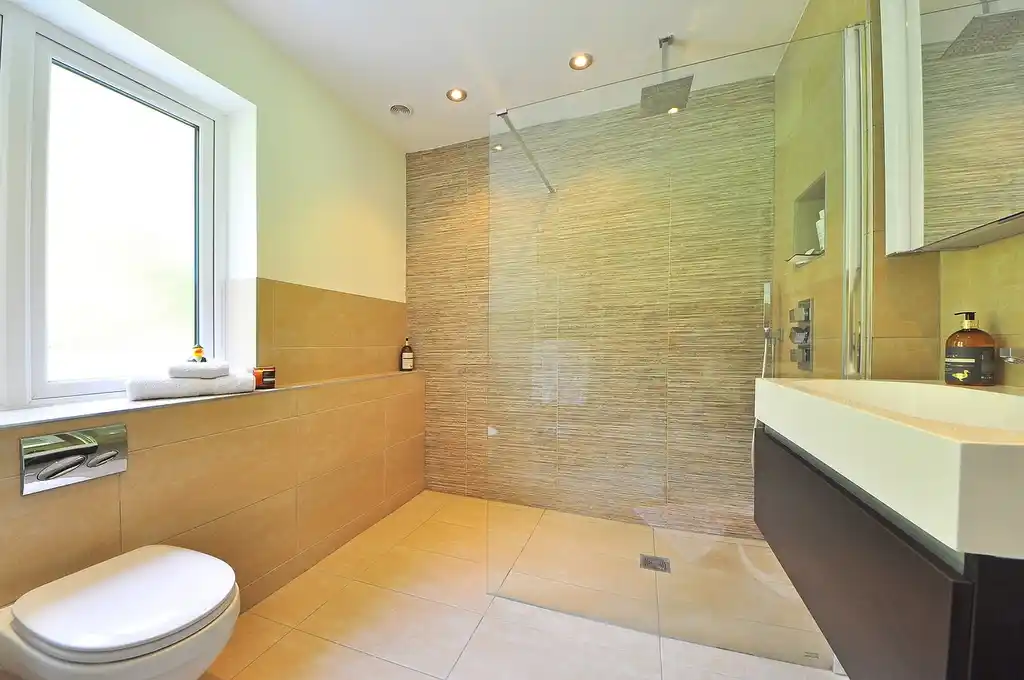
Bathrooms and their walls get usage, lots of uses. And over time, it starts to show. Nothing old is nice to look at.
Besides the obvious, you might be someone who wants to cover bathroom tiles to give them a new look. Regardless of your reason, here’s the ultimate bathroom tile cover-up guide.
There are many ways to cover up old tiles. But these are the most realistic ones that will give your bathroom wall a new look and increase its life. Whether waterproofing the tiles or adding beadboards to give a woody, dark atmosphere, we got it all covered.
Get your spectacles and notebook ready because we are deep-diving this one. Let’s get right into it.
Table of Contents
Key Takeaways:
- There are two types of paints and three main types of tiles.
- Bathroom tiles can be given a deep clean and varnish for a cleaner look.
- Beadboards or bathroom tile panels are one of the most effective ways to hide ugly, worn-out tiles.
- Quick setting cement only takes 15 minutes to set.
How to Cover Bathroom Wall Tiles Without Removing Them
We’re right onto action. As this will work as a complete guide, you should have some key ideas on how you can cover bathroom tiles. Here’s a quick overview:
- Waterproofing to cover tiles in the bathroom
- Shower or bathroom tile panels
- Bathroom tile resurfacing
- Quick setting cement
- Wood effect
- Wallpapers, stickers, or painting
- Tile over tile
Now that you have a brief idea of what to expect let’s get to work. Get your tools ready with all the protection because, let me tell you, you’ll get your hands dirty.
1. Waterproofing for Covering Bathroom Tile
Although your tiles have been waterproofed tight before being set on, if your tiles look gloomy, waterproofing is a way to go. This way, you are adding extra protection, increasing the life of the bathroom tile and making it more appealing.
Besides the increased lifespan, you also have multiple options for paint finishes. They come in matte, glossy, and satin-like finishes. Matte is a fan favorite.
However, before you clean the tiles, don’t be blindsided. Although there are multiple videos online where you can watch tutorials, here are some quick tips from us. Hey, if an extra step can make your bathroom tiles stand out, it doesn’t hurt to do it, right?
- Clean the tiles properly: Although this might seem like a job you’re used to doing on weekends, you need to pay attention. Cleaning the tiles must be neat and precise.
- Sanding the tiles: Sanding is as necessary as cleaning the tiles. Because if you miss a spot, you’ll be left with uneven tiles that are definitely not ready for the next step.
- Choosing the right type of paint: There are two types of paint, latex and epoxy. Both have similar characteristics, except epoxy is a little stronger than latex. We recommend going with epoxy as it will function better on bathroom wall tiles as they’ll get wet water often.
- Choosing the right primer: Primer is like the final touch once you’re done with the new paint. Therefore it’s often underlooked. However, make sure you choose the correct waterproof primer because this is all that will play a part in your bathroom tiles being waterproof.
Now that you know how to cover tiles in bathroom, let’s take a quick look at the pros and cons.
Pros of Waterproofing:
- Completely customizable, you can have different designs on different walls.
- Inexpensive
- Can survive rough usage
Cons of Waterproofing:
- Takes a lot of time to waterproof
- The bathroom tiles can’t be used for at least a week after waterproofing
Everything has its advantages and disadvantages. This is nothing new. But this could be a great choice if you’re on a budget and want to do something that won’t need a professional’s help.
2. Bathroom Tile Panels
This is by far the implied way you can get rid of the dirty look your bathroom tiles give you. They are also called shower panels, and they make bathroom tile cover-up way easier.
The best part about these bathroom tile panels is that they are made of PVC. You don’t have to worry about external damage caused by it. They are also easy to install.
As many color and design options are available, you can be creative and even install them anywhere outside the bathroom. Need a better tile in the kitchen? PVC panels got you covered.
As mentioned earlier, the installation is easy. It can be broken down into only four steps. Let’s get to it.
Step 1: Clean the tiles
Before any customization to the old tiles, they must be adequately cleaned.
Step 2: Measure your tiles
As panels are not for individual tiles, you need to figure out the exact measurements for each side of your bathroom wall.
Step 3: Installation
You can do this by yourself, as the installation is simple. Just apply glue and stick the panels in; that easy. Usually, installation kits come with panels.
Here are the pros and cons of bathroom wall panels:
Pros of Bathroom Tile Panels:
- Inexpensive
- Doesn’t take too much time
- Sturdy can go through serious use
Cons of bathroom Tile Panels:
- Not made out of the most premium material
You win some, you lose some. That’s the way of life.
3. Bathroom Tiles Resurfacing
Bathroom tile resurfacing is basically deep cleaning and varnishing the tiles for a shinier look. If your tiles are physically damaged, resurfacing might not help to make them look better. You would have to go with other options in this list.
Before we get started, know that it is a lengthy process. You are expected to have time in hand and go through multiple steps for resurfacing. These are the tools you’ll need:
- Sandpaper
- Brush
- Primer
- Resurfacing kit
- Roller
- Sponges
- Gloves
First is the cleaning process; obviously, you’ll have to deep clean the tiles before you get on with the next step. Once you’re done cleaning, use the sandpaper and sand the tiles to improve the reglaze paint set.
Mix the reglaze kit together in a separate container or bowl and use the roller to apply the paint. Have gloves on while you’re applying it, as some skin might be sensitive.
Once the first coating is dry, apply the second coating of reglaze, and you’re done. Let the entire paint sit for some time, and your bathroom tiles will look as shiny as when you first bought them.
Pros of Bathroom Tiles Resurfacing
- Inexpensive
- It can be effective if you’re on a tight budget
- Doesn’t require professional tools
Cons of Bathroom Tiles Resurfacing
- Not a long-term solution
- Resurfacing process is time-consuming
However, you can always call up a professional if you don’t wanna go all DIY mode. Not everyone has the time; besides the patience, you need to have to do it yourself. Man, it’s crazy.
4. Quick setting cement
Quick-setting cement is another affordable alternative to cover tiles in bathroom. They are also known as fast-setting cement. Their job is self-explanatory.
They set within 10-15 minutes and can give your old rusty tiles a sleek look within a budget. As this is a very cost-effective option, you can save money by choosing your cement type and setting it yourself.
You can go for concrete or white cement, but they won’t be of much use during bathroom tile cover up. They were most likely used when the tiles were put onto the bathroom walls. Here is how to put quick setting cement on old tiles in easy steps.
Step 1: Cleaning the old tiles
At this point, this is essential for old tiles renovation, so there is nothing new to explain. Make sure to get each gap uniformly.
Step 2: Filling all the gaps and joints
Apply your quick-setting cement on each gap evenly. Give it some to dry up before going for the second cement coating.
Step 3: Priming the tiles
You can use quick-setting cement or an external primer to give the final set.
Step 4: Wait for it to dry
Once everything is done and dusted, wait for the tiles to dry. Give it some generous time, and you’ll be thanking yourself.
You can also check out this post for further knowledge on applying quick setting cement on old bathroom tiles and becoming the master of quick setting cement. You’re welcome.
And, as always, why you should use quick-setting cement for your bathroom tiles renovation and why you should reconsider.
Pros of Quick Setting Cement
- Affordable
- One of the most effective ways to cover bathroom wall tiles.
Cons of Quick Setting Cement
- Time-consuming
- Requires a lot of physical labor, if you’re doing it yourself
5. Beadboards- The Wood Effect
If you want your bathroom tiles to have a more vintage or mature look, the wood effect is the only way to go. Makes your bathroom walls look classy and modern with minimum effort.
This process is also known as beadboards. They can be bought individually once bathroom wall measurements are provided. Beadboards are also a more practiced form of bathroom tile cover up.
This makes them easy to find and won’t hurt your wallet. Beadboards are normally used in kitchens or dining areas in the house to give the rooms a new look. But as you can see, they can also be used in bathroom walls.
Quick tips, before you install, make sure you waterproof the tiles altogether. If your bathroom tiles have grout, include them in the waterproofing process.
You can also paint the beadboards to your desired designs if you want to. However, if you’re lazy like us, you can always get beadboards that are pre-designed.
Another thing to remember is that the priming before breadboards must be even and equal. The uneven setting of waterproofing will cause damage to beadboards. Ultimately decreasing their life.
Pros of Beadboards
- You can attach shelves to the wooden beadboards, as they attach easily.
- You can customize it further with paint or more panels.
- Wooden beadboards are more heat-absorbent than tiles.
- They’re cost-effective and don’t take up much time.
Cons of Beadboards
- Not very wet area friendly
- Might get bloated over usage
Wood definitely has some beef with water because we know wood doesn’t perform well in soaked areas. But then again, a bit of waterproofing and priming will do wonders for the wood. Besides, we can’t deny that we love the dark and mysterious vibe of woody beadboards.
6. Wallpapers & stickers- Fake it till you make it!
This is the laziest way to hide sad and dirty bathroom tiles. But it does wonders. Besides, if you are smart enough, you can get a complete bathroom wall renovation. Making it one of the easiest ways of how to cover bathroom wall tiles without removing them.
However, while this may look like an effortless way of making your bathroom look better, it has some disadvantages. Many stickers might not be suitable for your bathroom tiles. They are less substantial than quick-setting cement or wall panels.
That being said, if you’re a student with a tight budget. Wallpapers and stickers could really benefit you.
Pros of Wallpapers & stickers
- A very budget-friendly option for bathroom tile cover up
- Takes little to no time for installation, you just stick the wallpapers to the tiles, and that’s about it.
- It doesn’t need time to sit and dry after installation. You can use the bathroom almost immediately.
Cons of Wallpapers & stickers
- Not the most sturdiest option for renovation
- Not all the wallpapers are heat-friendly
- Lack of customization, once they’re set on the wall, it’s harder for them to come off
Considering it’s an inexpensive option, we think it’s a good way to go if you don’t have the budget or time for something better.
7. Tile over tile
Tile over tile is practical, yet a peculiar way to cover up bathroom wall tiles. It does exactly what it says. You add new tiles over the previous ones to hide the previous ones.
It takes up a lot of time, not to mention tiles aren’t cheap. So, in the end, even if you’re hiding old tiles with new ones, you still have to choose which type of tiles you want. There are 3 main types of tiles:
- Ceramic tiles
- Porcelain
- Shiny/ Unglazed
You have to choose the type of your tiles, make measurements, clean your old ones, and install the new ones. So, yes, it could be done, but it’s not the most bang for your buck option in this list.
However, one of the significant advantages of new tiles is that your tiles and bathroom walls remain intact for much longer.
Pros of tile over tile
- Bathroom walls can have a totally new look
- Remain rigid and untouched for a longer time
- A safer way of bathroom wall renovation
Cons of tile over tile
- Expensive process
- Takes up a lot of time
If you have the budget for tile over tile, just remove the old tiles or go for beadboards. They’re much cheaper and a better alternative option.
Wrapping Up
If you’re still wondering how to cover bathroom wall tiles, know these are the only options. Whatever you choose totally depends on you.
That being said, you should always check whichever suits and compliments your bathroom walls the most. You should also consider the budget, availability, design, and total lifespan of the bathroom wall tiles. Understanding which is the best fit for your bathroom wall tiles is crucial.
Read More: